 When you are ready to use your altimeter in an Olympus flight, the following steps are recommended. You can use this as a baseline for developing your own checklists for all four stages of the flight.
Preflight
- Determine which microSD card will be used for flight. It is recommended that a blank card be used and that you format the card prior to use. Place it into a computer to check for errors.
- You may wish to rename the card to something that make sense for the mission. This may include a flight date, project name, session number, etc.
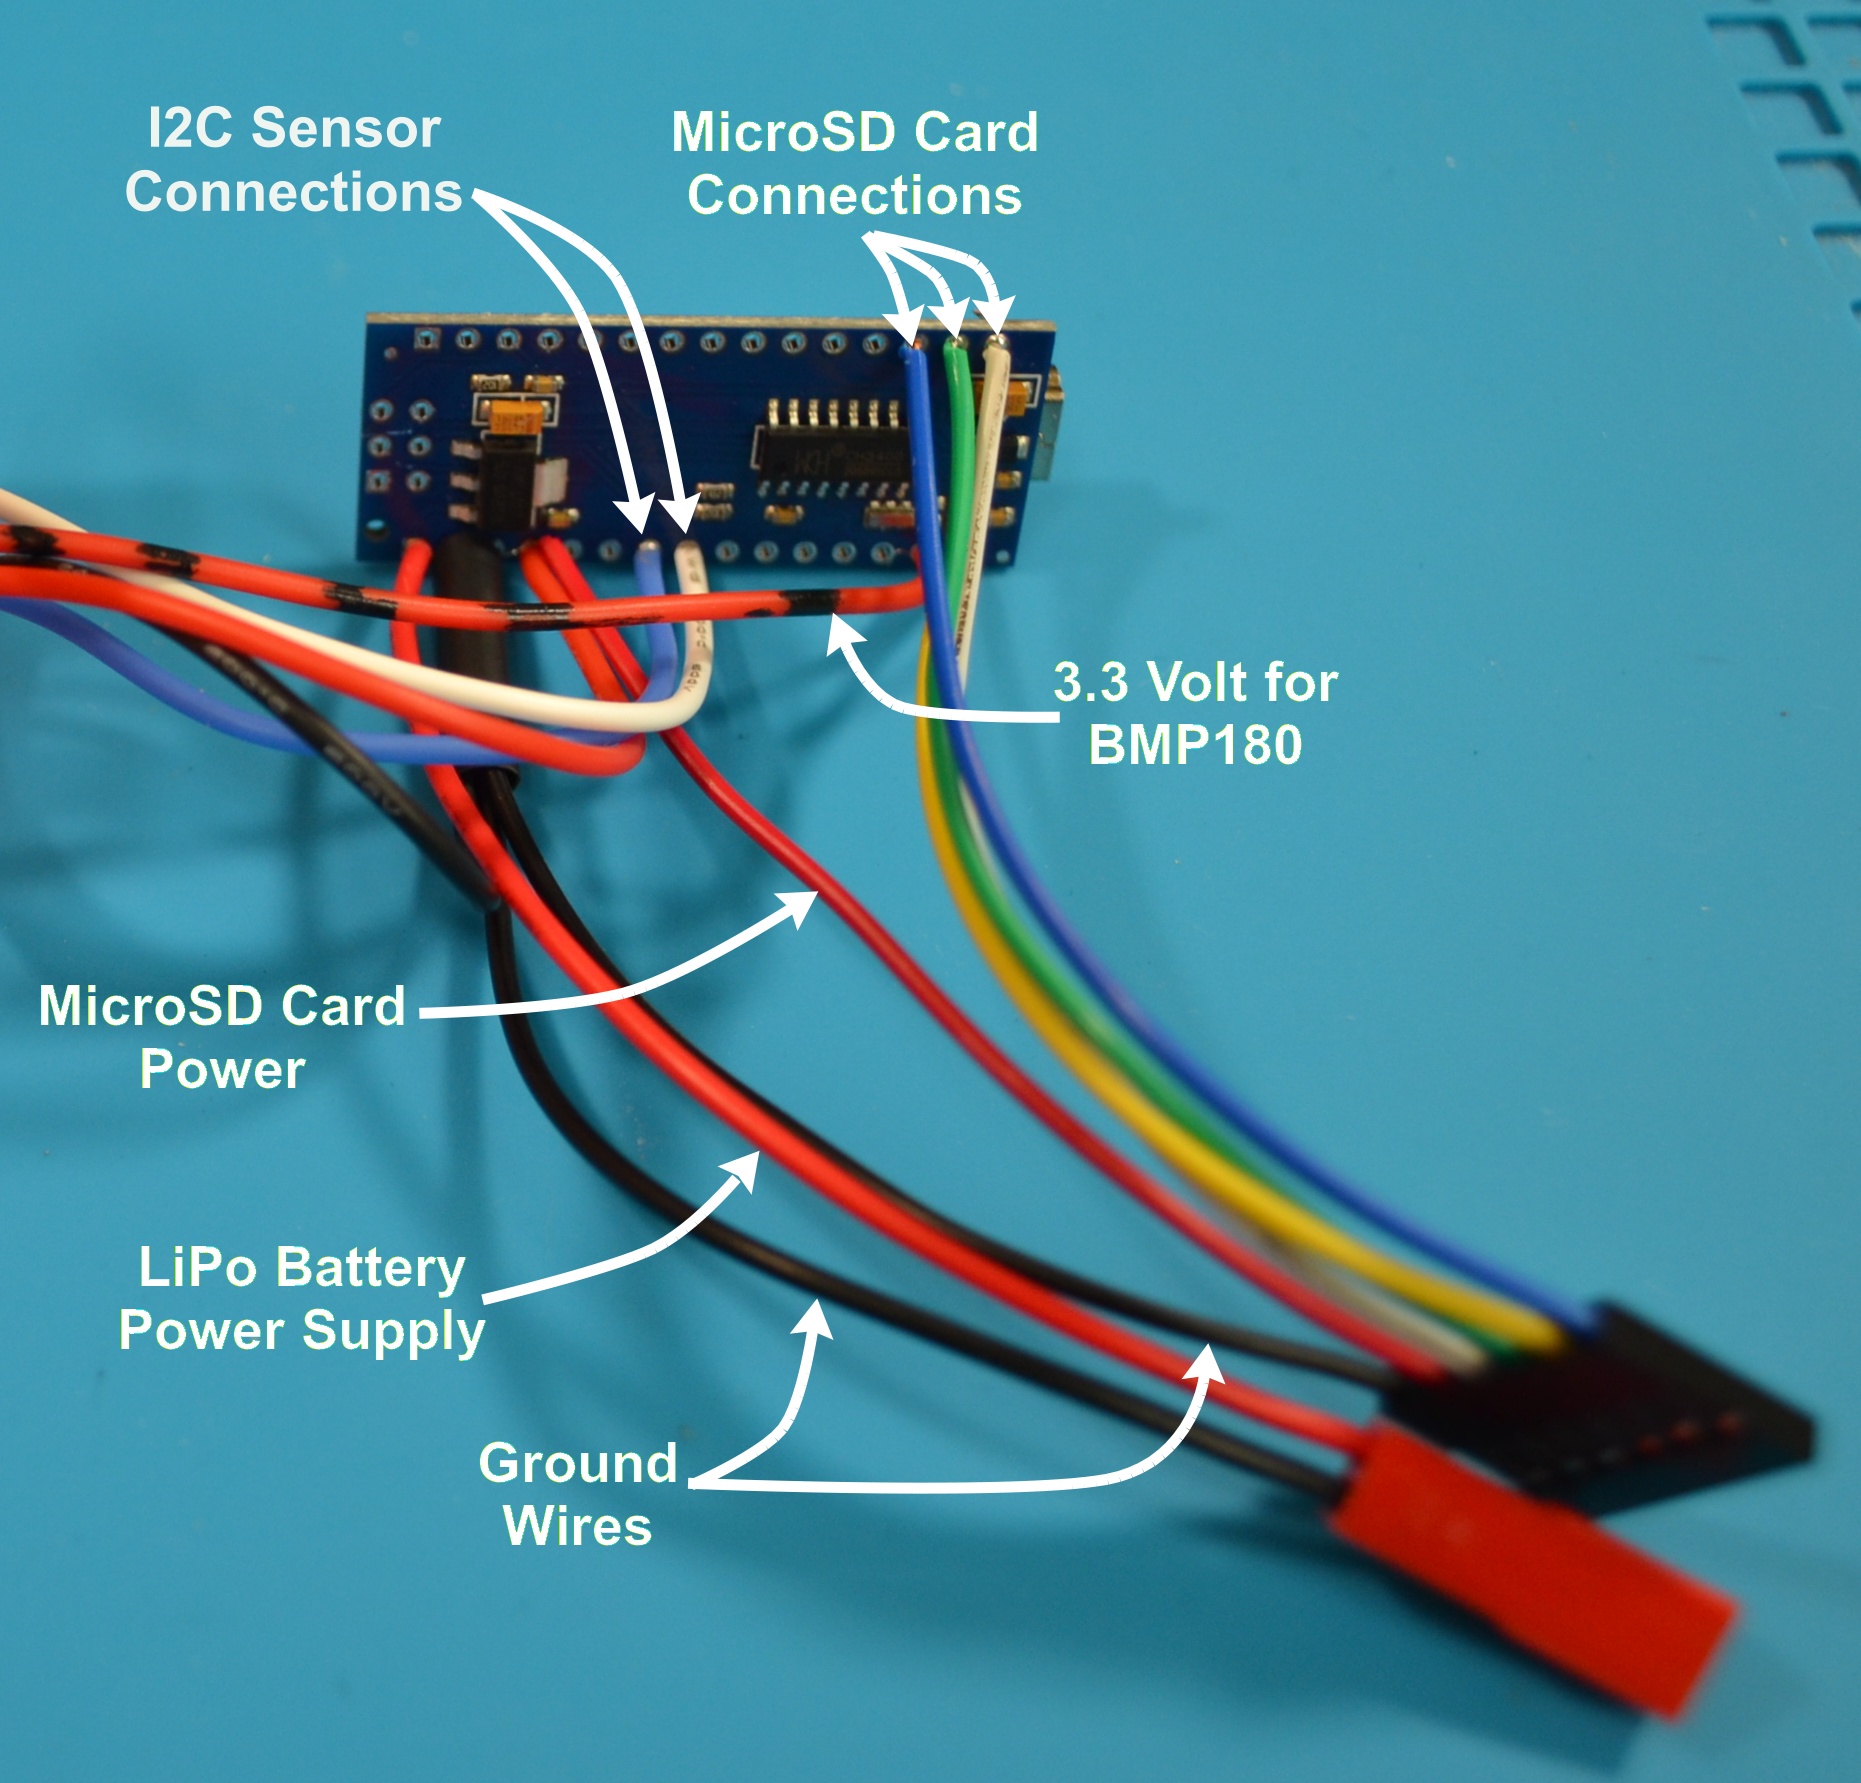
- Charge the battery. This will help ensure that you have plenty of battery power should you find your rocket and payload sitting on the pad for an extended period of time.
- Do a preflight test on the payload. Insert a microSD card and turn on the system. Move the payload bay around and then turn the system off. Remove the card and insert it into a computer and read the data. This will help ensure everything is working properly before heading to the pad.
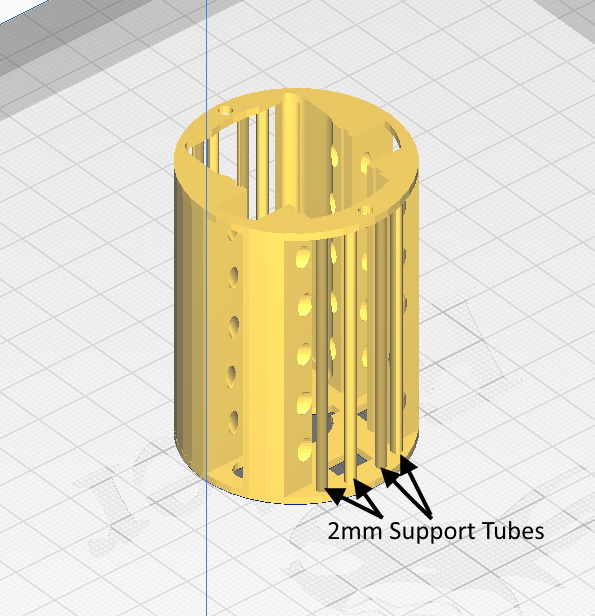
- Place clear payload bay over the electronic payload. Secure to payload base using tape. Do not cover vent holes located near bottom of the payload bay.
At the Launch Pad
- Insert the flight ready microSD card into the payload bay.
- Connect the two battery clips to power on the system. The status lamp should turn green to indicate the system is functioning as expected. If you get a color other than green, it indicates an error in the system. Error messages include:
- Flashing Red – microSD Card Module error.
Check that a card has been inserted into the holder. If a card is present remove and reinsert. If you still get a flashing red lamp, try a different card. If still getting a flashing red lamp, check for loose connections - Flashing Yellow – MPU6050 error.
Check for loose connections - Flashing Blue – BMP180 error.
Check for loose connections - Steady Blue – File Write error
This indicates that there was an issue while attempting to write data to the microSD card. This error will attempt to self-correct by resetting the microSD card module. If it does not reset check the microSD card and replace.
- Flashing Red – microSD Card Module error.
- If payload appears to be working properly, attach nose cone to payload bay and secure with tape.
During Flight
- Observe the flight of the rocket so that it can be recovered successfully
- You may want to use multiple observers. If the payload bay were to separate from the rocket one observer can track the payload bay while the second observer tracks the rocket.
- Track payload bay to landing site. Upon arriving on the landing site, remove the tape from the nose cone and remove the nose cone from the payload bay.
- Disconnect the battery from the payload to turn off the payload
- Observe the overall condition of the payload. It anything appears missing, you may want to search the local area.
Post Flight
Upon returning to the flight preparation area
- Remove the payload bay tubing from the payload
- Remove the microSD card from the payload.
- Insert the microSD card into a computer. Confirm that there are data files on the card. Copy data files from microSD card onto the local computer
- During the appropriate time, perform analysis on the data collected
- Check the rocket and payload. Make note of any damage or missing components. Depending on any damage that has occurred, make a determination
- on whether it is safe to continue flying in the current condition
- to repair the rocket on site and attempt to fly again
- if the rocket will need extensive repairs offsite in order to fly again
- if the rocket has sustained major damage and is no longer in a repairable condition
- Make any notes and observations that may be appropriate for the mission/project.